
After Repairing Dozens of Them
I’ve been working as a finish carpenter and home repair contractor for over a decade, and if there’s one oddly specific problem I keep seeing, it’s door trim chewed up by dogs. Puppies, anxious rescues, bored large breeds—you name it. I’ve repaired everything from light gnaw marks to trim that looked like it went through a wood chipper.
The good news is this: most of the time, you don’t need to replace the entire trim. And even when you do, it’s not as intimidating as it sounds.
The First Time I Dealt With This
I still remember a job from a few years back. A client had a young Labrador that chewed the bottom corner of their bedroom door casing every time they left the house. The damage wasn’t just surface-level—the wood fibers were torn, splintered, and compressed.
They assumed the whole frame needed replacing. It didn’t. I repaired it in under two hours, and once painted, you couldn’t tell anything had happened. That’s when I started realizing how often people overestimate the repair.
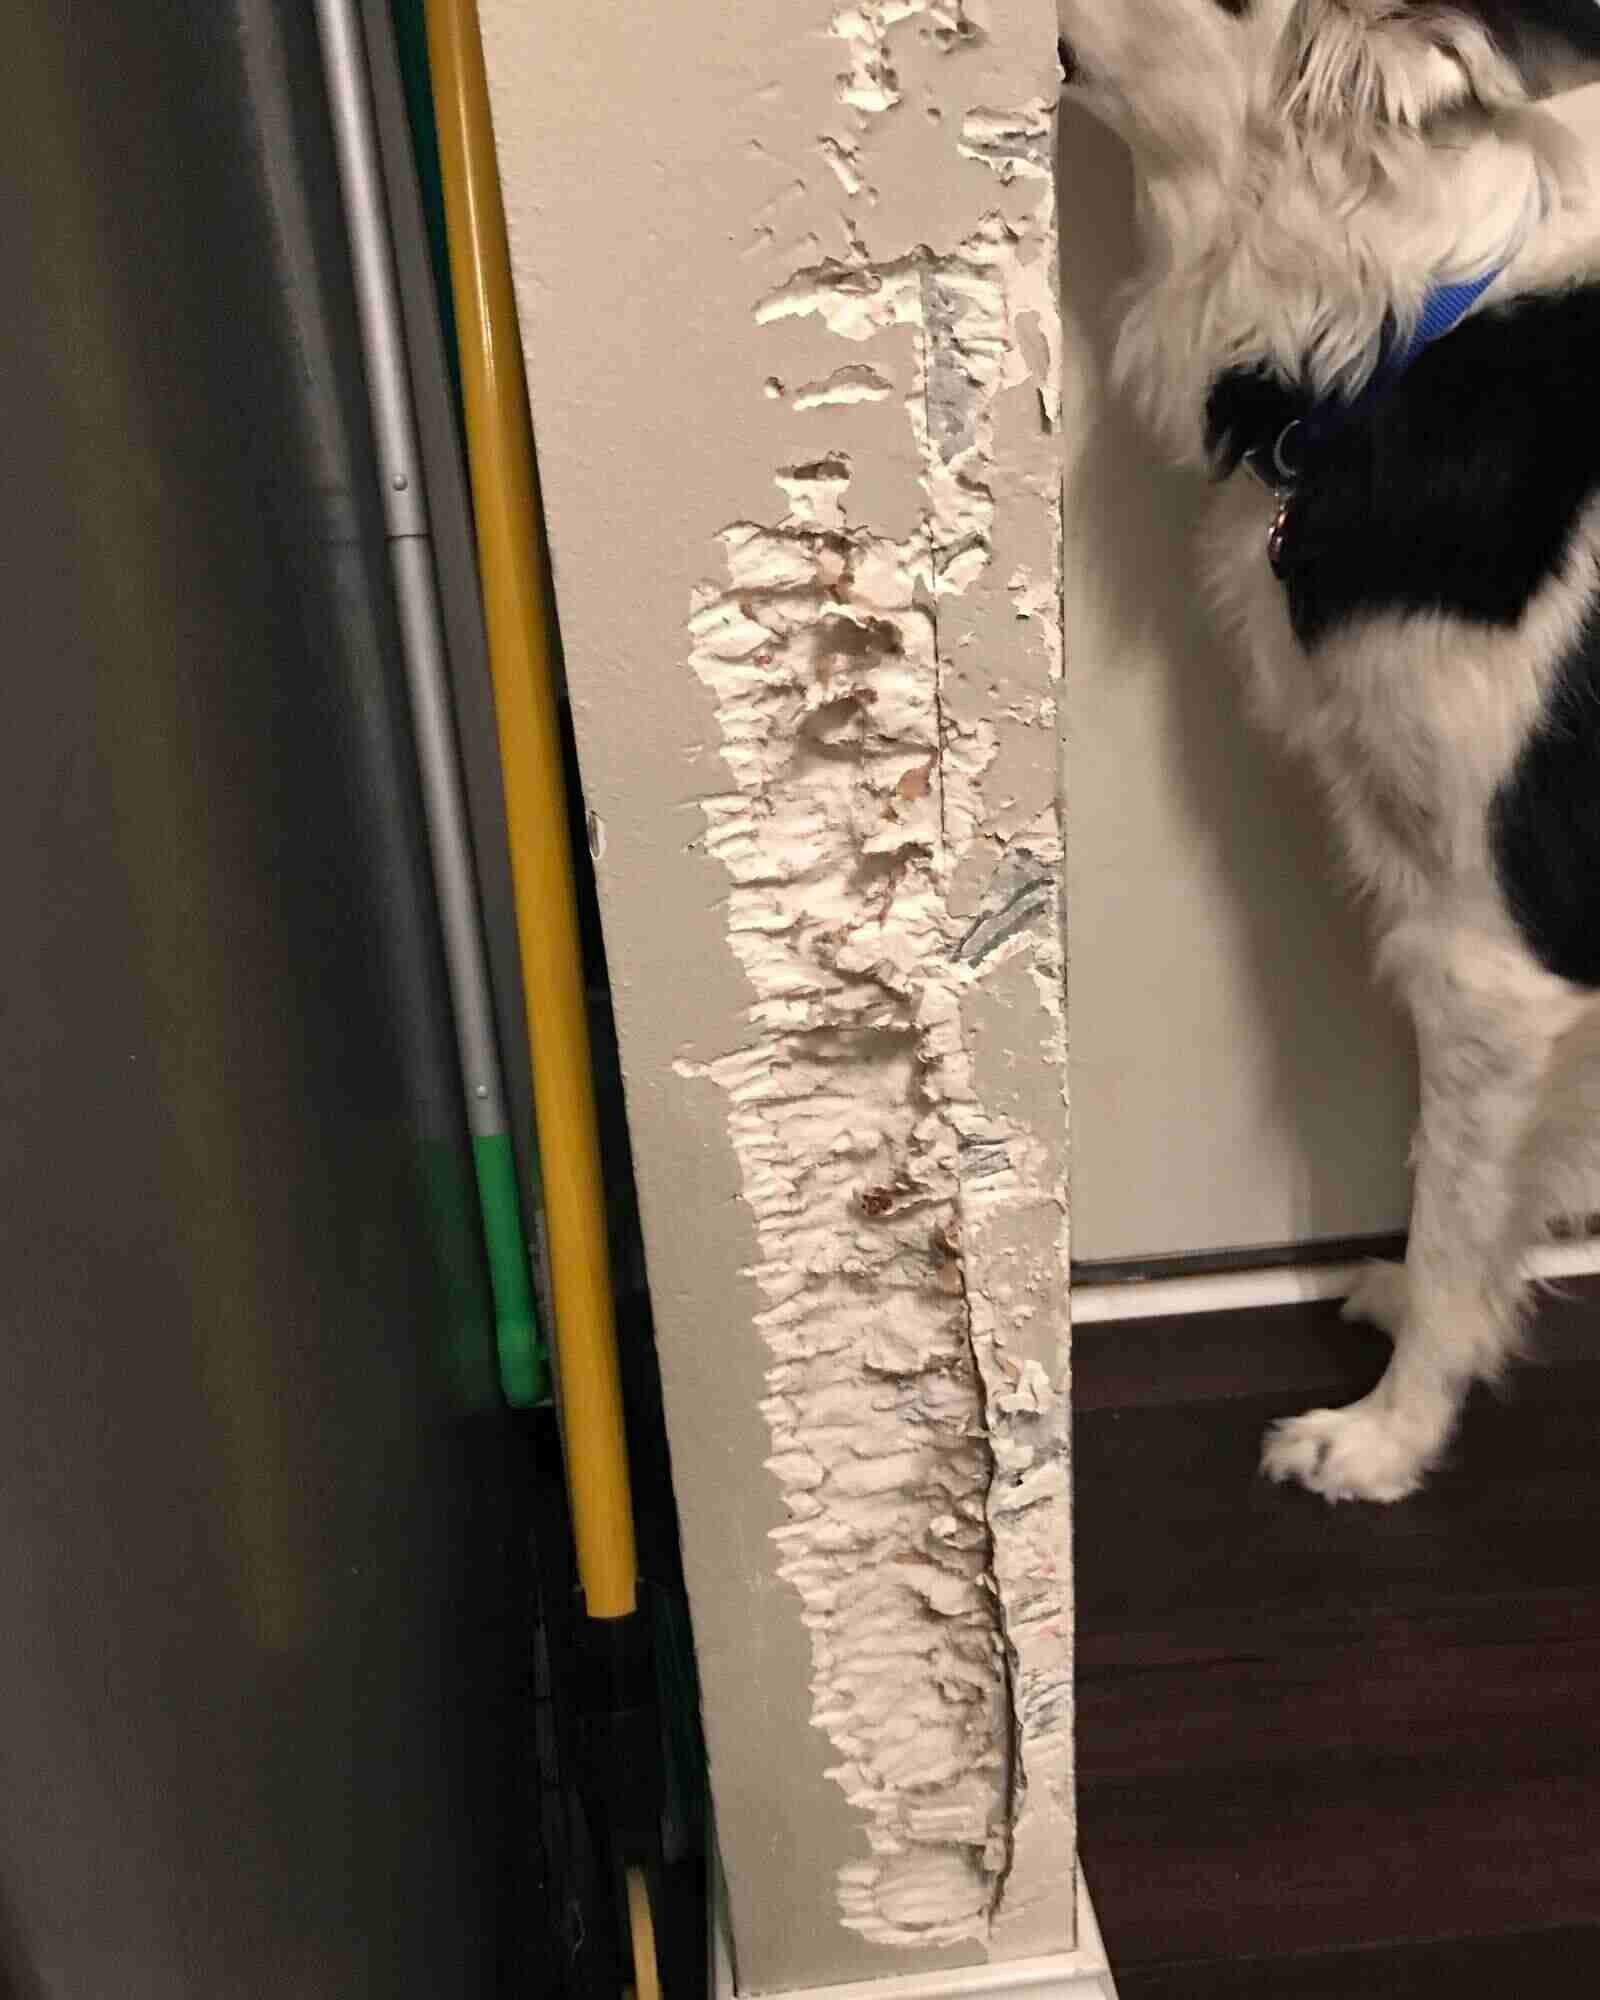
Step One: Assess the Damage Honestly
Before touching any tools, I always run my hand over the damaged area. If the wood is just rough and dented, it’s a simple fix. If chunks are missing or the trim profile is destroyed, it may need rebuilding—or replacement.
In my experience, damage falls into three categories:
- Light chewing: scratches, shallow dents
- Moderate damage: deeper gouges, rough edges
- Severe damage: missing sections, broken trim shape
Most homeowners are dealing with the first two.
Step Two: Clean and Prep the Area
One mistake I see all the time is people trying to fill over loose splinters. That never holds.
I use a utility knife or chisel to remove any soft, chewed-up wood. You want a solid base. Then I sanded the area to smooth out rough edges and feather it into the surrounding trim.
A customer last spring tried skipping this step and went straight to filler. Within a week, the patch cracked and fell out because it had nothing solid to grip.
Step Three: Rebuild with Wood Filler
For most repairs, I rely on a high-quality wood filler or two-part epoxy. The cheap stuff shrinks and cracks—don’t use it for anything deeper than a scratch.
I press the filler firmly into the damaged area, slightly overfilling it. That gives me room to sand it back to the original shape.
If the trim has a decorative edge, I shape it while the filler is still slightly soft. This takes a bit of patience, but it’s what separates an obvious repair from an invisible one.
Step Four: Sand Until It Disappears
Once the filler is fully dry, I sand it down to match the surrounding trim. I usually start with medium grit and finish with fine grit for a smooth surface.
This is where most DIY repairs go wrong. People stop too early. If you can feel the patch with your fingers, you’ll definitely see it after painting.
I had one homeowner insist their repair was “good enough” before painting. After the first coat, every imperfection stood out twice as much. We had to sand it all back and redo it.
Step Five: Prime and Paint
Bare filler absorbs paint differently than wood, so primer is non-negotiable. I apply one coat of primer, let it dry, then lightly sand again.
After that, two coats of paint usually blend everything seamlessly. If the trim color has aged over time, you might notice a slight difference—but in most cases, it’s barely noticeable.
When Replacement Is the Better Option
There are times I don’t bother repairing. If the trim is severely chewed or the profile is completely destroyed, replacing that section is faster and cleaner.
Trim is relatively inexpensive, and pre-primed options make installation straightforward. I’ve had jobs where rebuilding the shape took longer than just cutting and installing a new piece.
The Mistake That Keeps Happening
The biggest mistake I see isn’t even the repair—it’s ignoring why the dog chewed the trim in the first place.
I’ve had repeat clients who fixed the same spot multiple times because the underlying issue—separation anxiety or boredom—was never addressed. One homeowner ended up installing metal corner guards after the third repair because their dog kept returning to the same spot.
Fix the trim, yes. But also change the situation that caused the chewing.
What I Recommend, Based on Experience
If the damage is minor to moderate, repair it. It’s faster, cheaper, and surprisingly effective when done properly.
If it’s severe, replace the section and move on.
And no matter which route you take, don’t rush the prep and sanding. That’s where the real difference is made. I’ve seen quick fixes fail in days, and careful repairs last for years without a trace.